Last Updated: January 2025
Overview
The Program functionality within Retreat Guru can be used in many ways - retreats, events, private hotel-like stays, packages, gift certificate sales, application forms, rental inquiries, residential and online programs, and more.
To best fit each use, you may wish to modify the content of titles, headers, footers, buttons, notes, and other areas. How? With text customizations!
To find your global text customizations, go to Settings > Website
Highlights
This article covers text customizations related to the following:
- Program description pages
- Registration forms
- Registration thank you pages
- Remote reg form header
- Waiting list forms
- Waiting list thank you pages
- Guest statement
- Link for guest to edit details
- Guest edit thank you pages
- Lead capture opt-in
- Programs hosted online
- Leaders and teachers
- Program listing plug-in
- Registration Bulk Print Template (Waiver)
Most text customizations can be configured globally - as the default for all programs - and customized at the program level (on a program-by-program basis).
If you customize the text globally and customize the same text field on a program level, the program level text will take precedence over the global setting.
In each section below, we'll cover the global settings first, and then we'll describe how to make text customizations for a specific program.
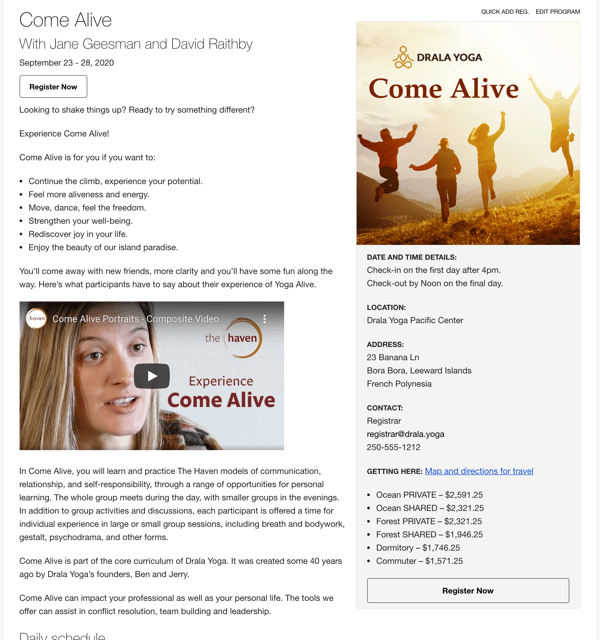
Program description pages
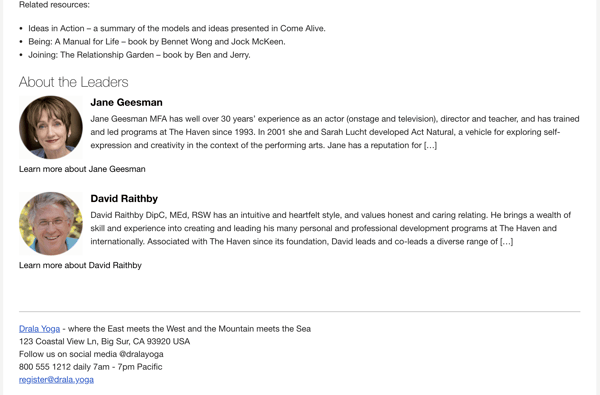
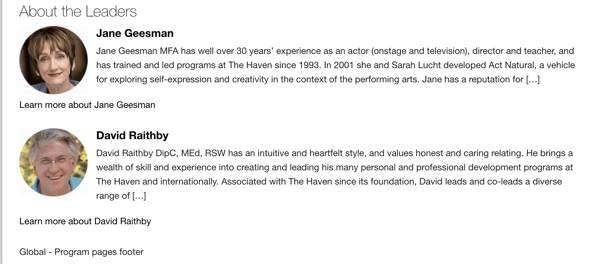
In addition to editing a program description and leader biography, you can customize certain fields in the sidebar on the program description page. You may also add a footer below the About the Leaders section.
The sidebar information may be configured only on the program level. The footer may only be configured globally.
See also, Configure a New Program and Configure a Program Hosted Online.
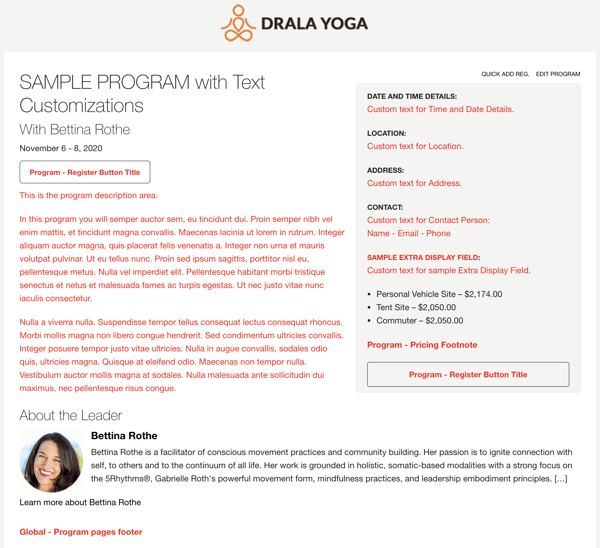
The image below shows a sidebar with key information about the Come Alive program, and a footer that includes the address and other information for the sample center Drala Yoga.
Global text customizations
A Programs pages footer may be configured globally at:
Settings > Website > Headers and Footers > Program pages footer
The Programs pages footer may not be configured at the program level - it may only be customized globally, for all programs.

When configured, the Programs page footer (shown in red below) will appear below the About the Leader section. The custom text is shown in red for clarity. By default, the text on your site will appear in black.
Program-level text customizations
Program information display page
Customize program information for a specific program at:
Programs > (choose a program to edit) > Edit Program > Information.
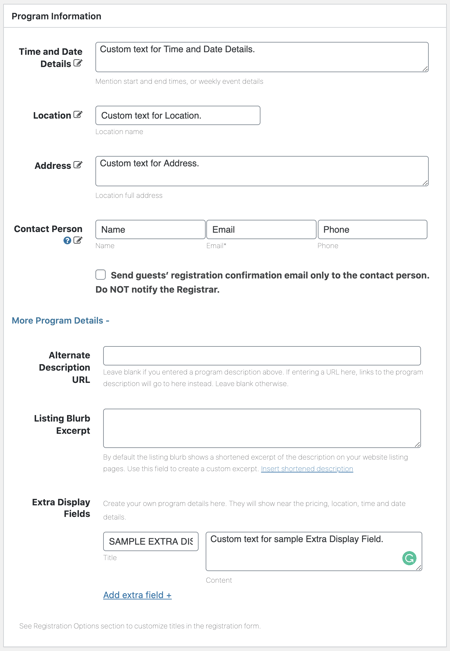
Customizations through Edit Program > Information will appear for that program only. The custom text is shown in red for clarity. By default, the text on your site will appear in black.
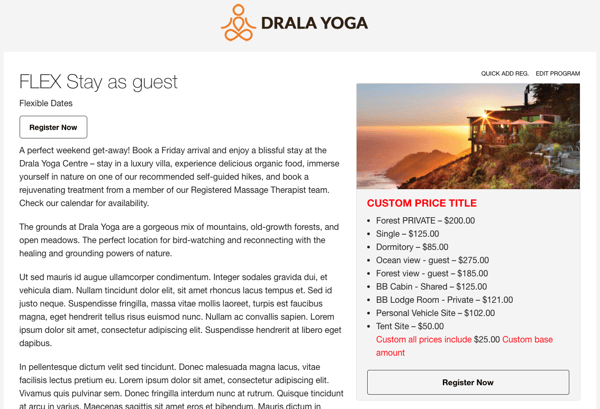
Program information display page - price title and base price amount
For programs that use the package builder pricing option, you may choose to display the base price (the package builder total, not including lodging) in the right-hand sidebar on the program information display page.
You may also customize the Price Title.
These fields are shown in red in the image below.
If you wish to show the base amount on the program description page, go to:
Settings > Website > Program Settings and check the box next to Show base amount.
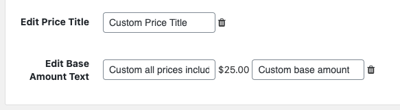
To customize the Price Title, go to Programs > (choose a program to edit) > Pricing and scroll to the bottom of the Lodging prices section.
Registration forms
You may modify titles, headers, footers, buttons, notes, and other areas to best suit a specific type of Program. For example, you may wish to display different text for retreats, events, private hotel-like stays, experience packages, gift certificate sales, application forms, rental inquiries, residential stays, online programs, and other types.
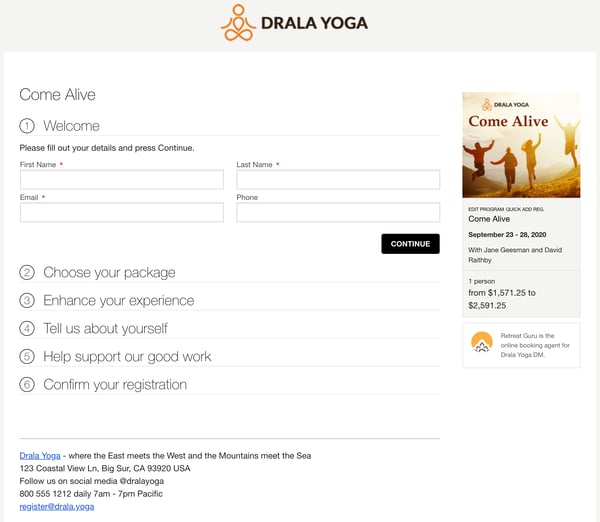
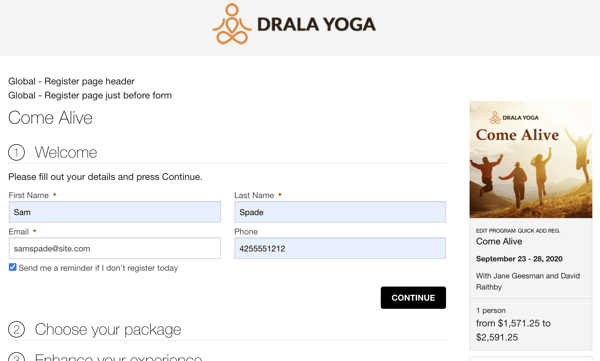
Here's a sample registration form with text customizations.
In most cases, these text customizations can be configured globally - as the default for all programs - and customized on the program level. Let's consider the global options first.
Global text customizations
The images below show registration form text customizations that may be configured globally - as the default for all programs. The custom text is shown in red for clarity. By default, the text on your site will appear in black.
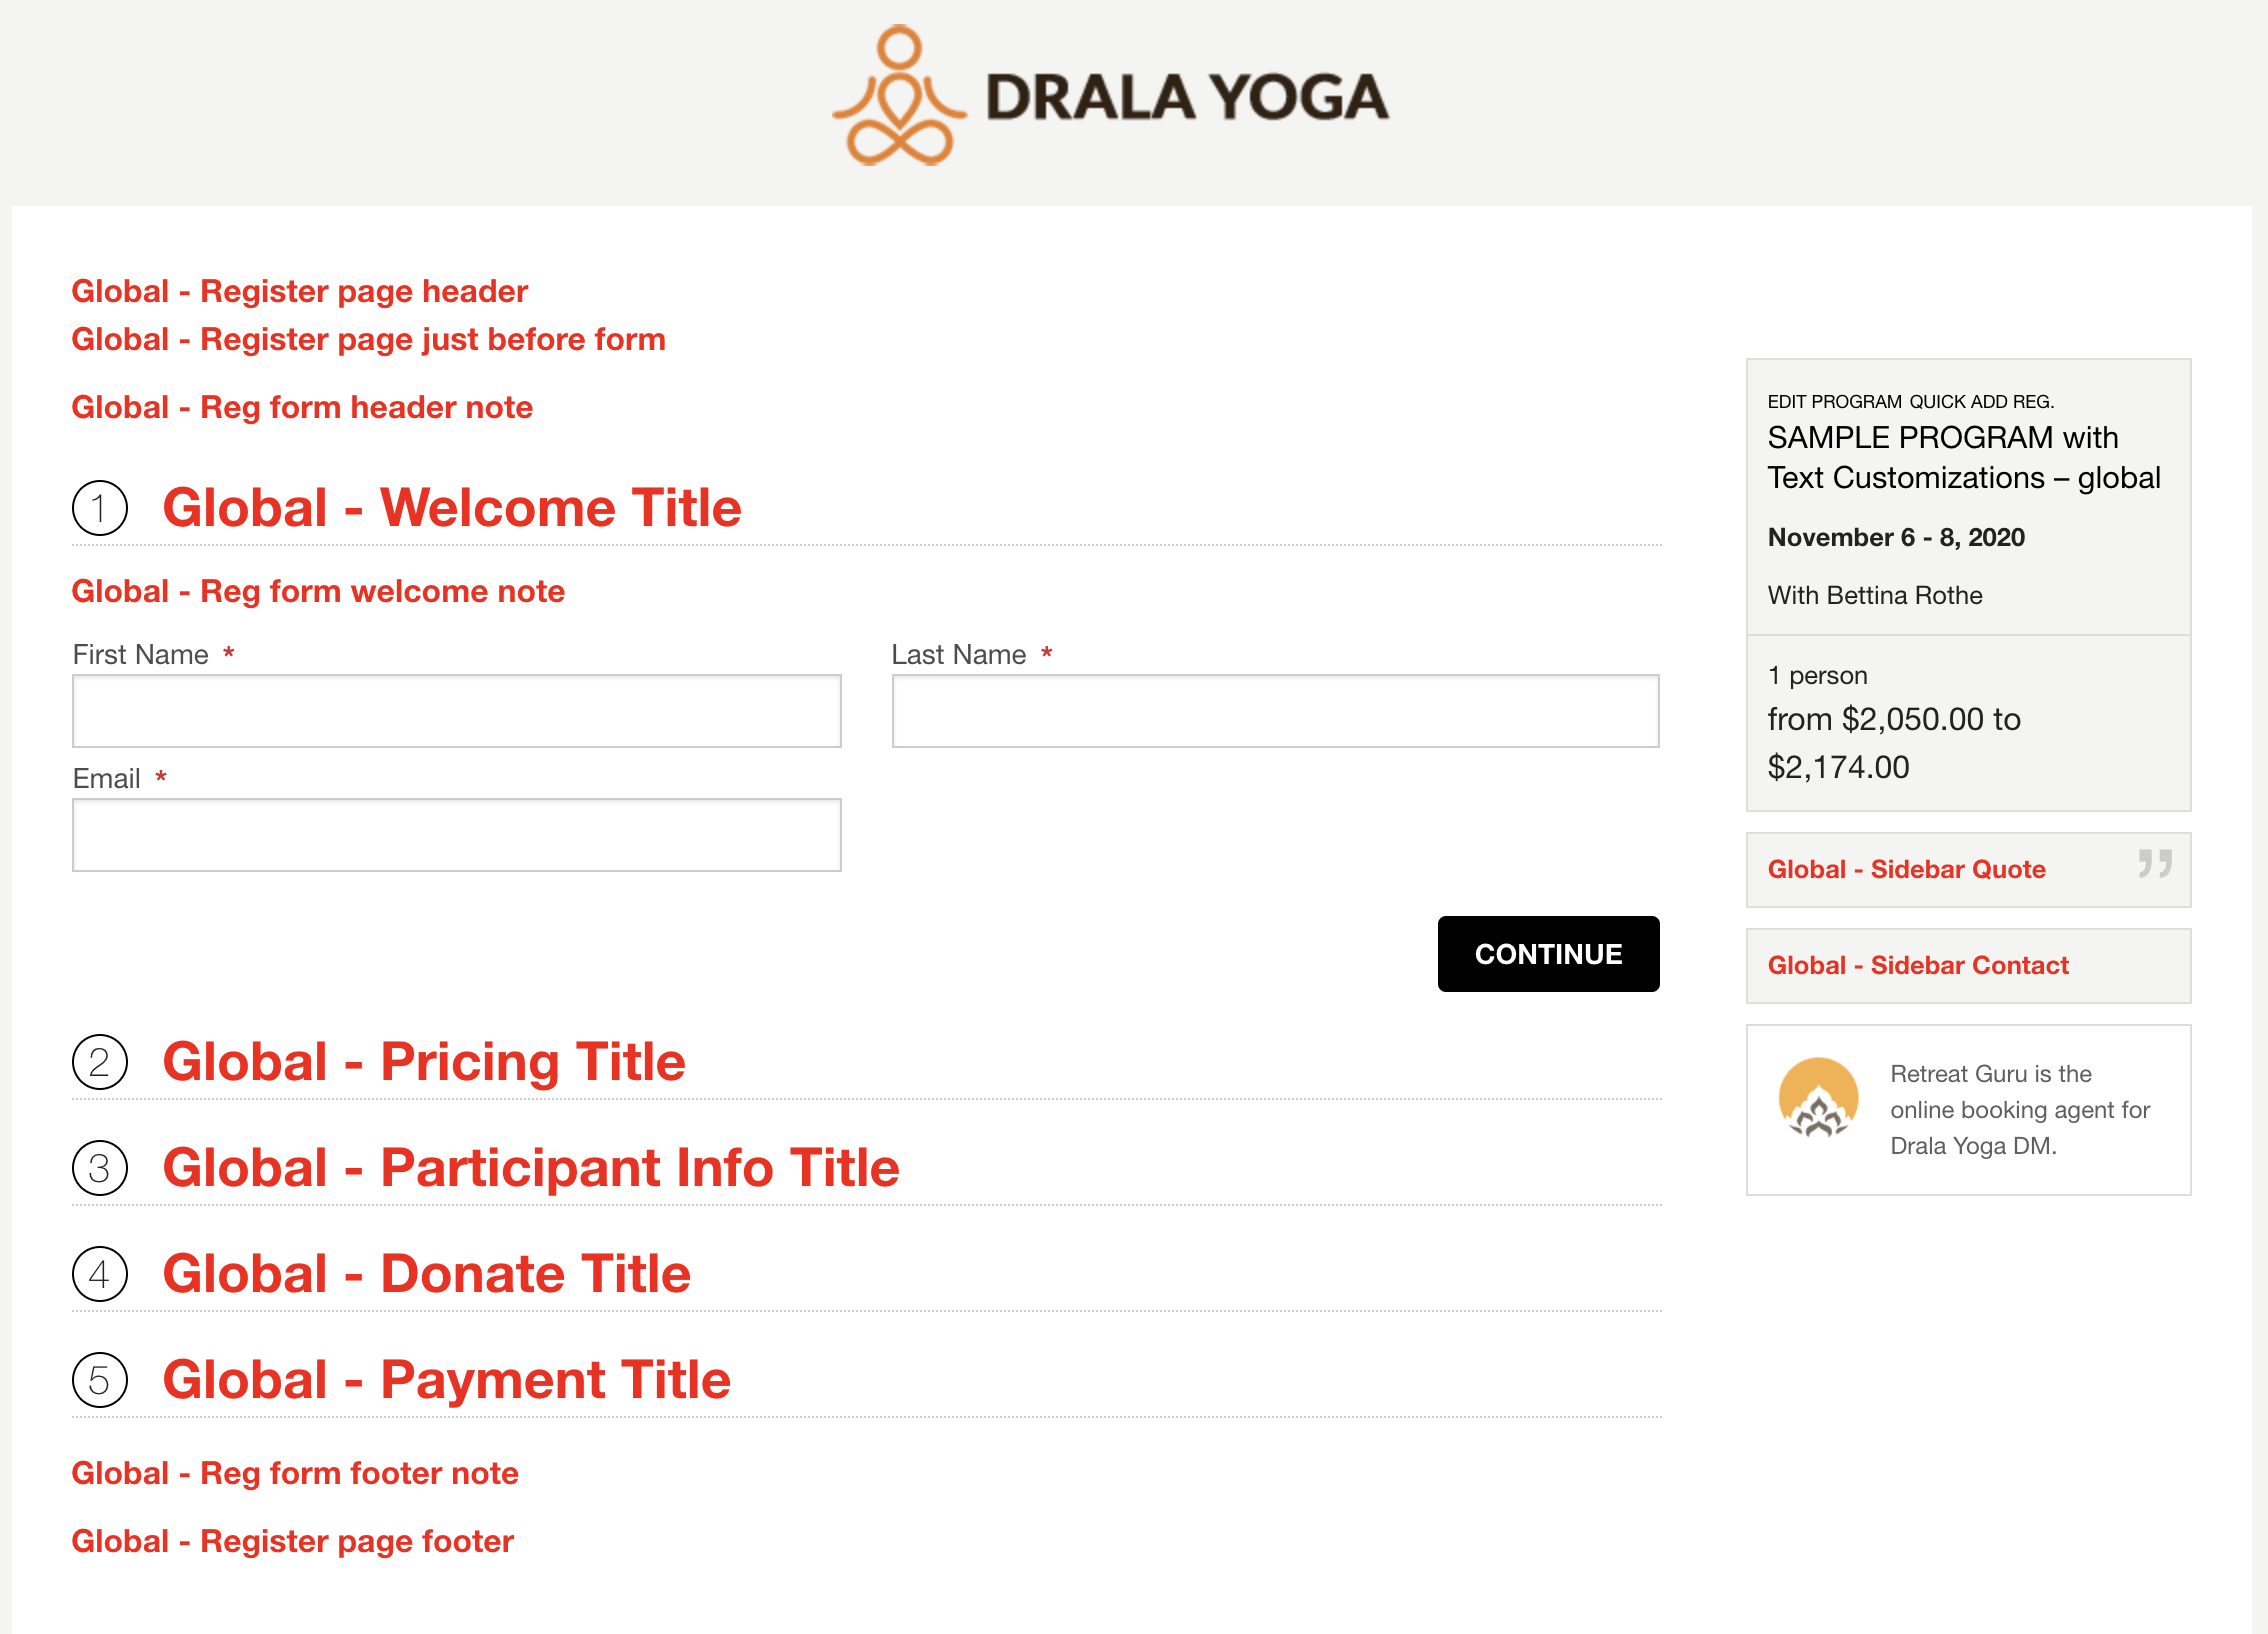
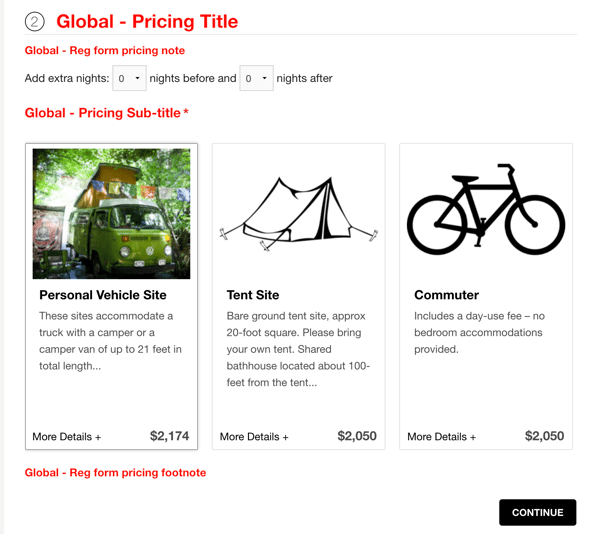
Clicking Continue to expand the other sections in our example, more text customizations appear in red.
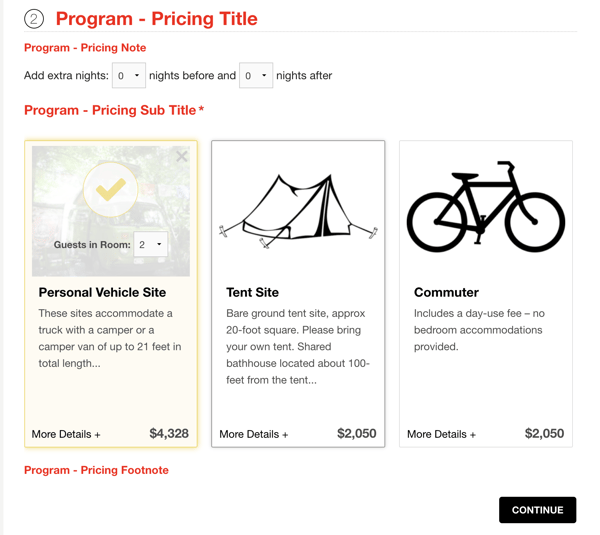
Note: the Pricing Sub-title only displays for lodging-based programs.

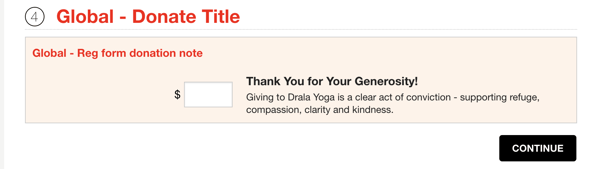
The Donation section shown below will only appear if donations have been enabled for this program.
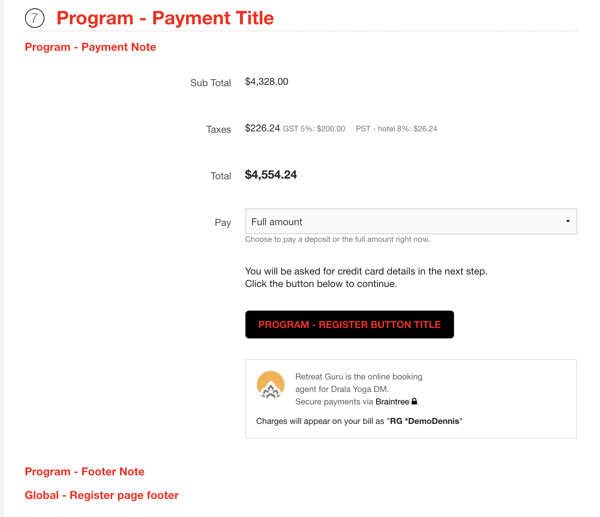
The Payment section shown below will only appear if payments have been enabled for this program.

Registration form headers and footers
Go to Settings > Website > Text Customizations > Headers and Footers to make global customizations to headers and footers.

Registration form titles
Go to Settings > Website > Registration form titles to make global customizations to registration form titles.

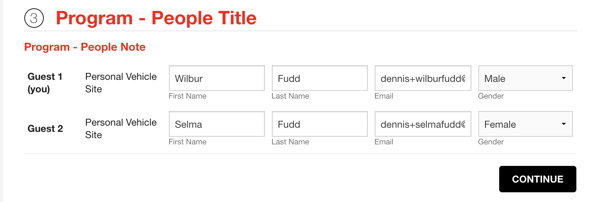
The People Title will appear only if multi-person registration is enabled and the person registers more than one person on the registration form. See the Program level text customization section later in this article for an example showing the Additional People option on the registration form.
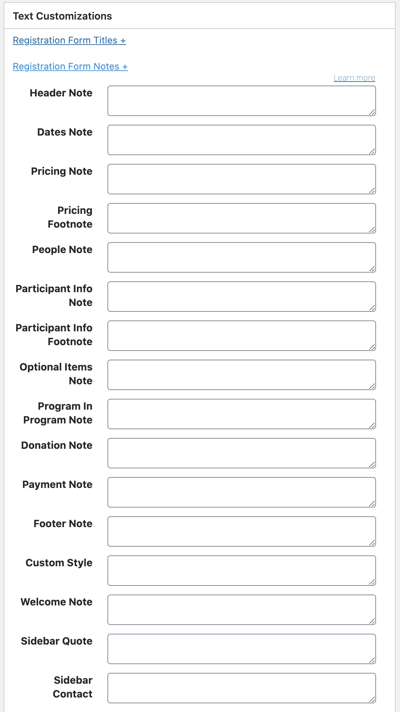
Registration form notes
Go to Settings > Website > Registration Form notes to make global customizations to registration form notes.

The People Note will appear only if multi-person registration is enabled and the person registers more than one person on the registration form. See the program-level text customization section below for an example showing the (additional) People option on the registration form.
Program-level text customizations
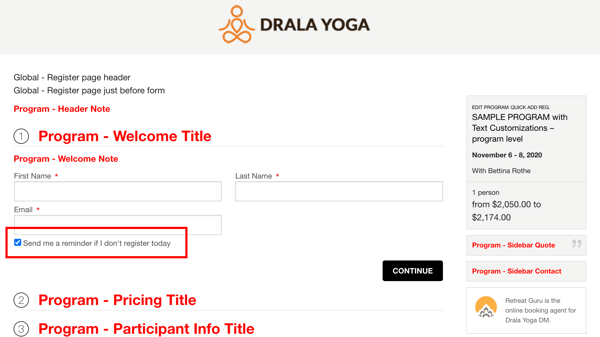
The images below show registration form customizations that may be configured at the program level. The custom text is shown in red for clarity. By default, the text on your site will appear in black.
The customizations marked Global may be configured on a global level only.
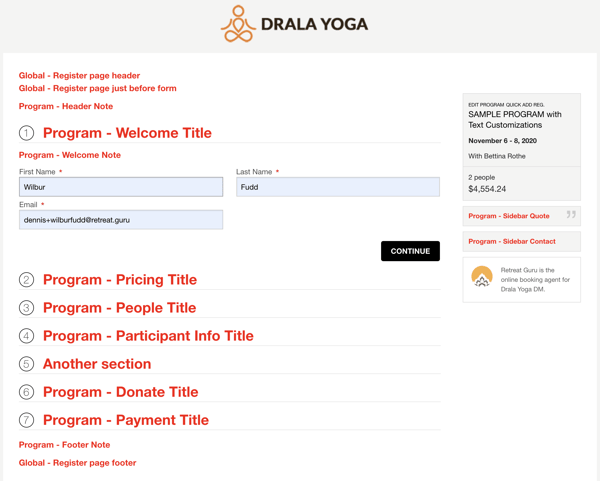
Clicking Continue to expand the other sections in our example, more customizations appear in red.
Note: the Pricing Sub-title only displays for lodging-based programs.
The People section shown below will appear only if multi-person registration is enabled and the person registers more than one person on the registration form.

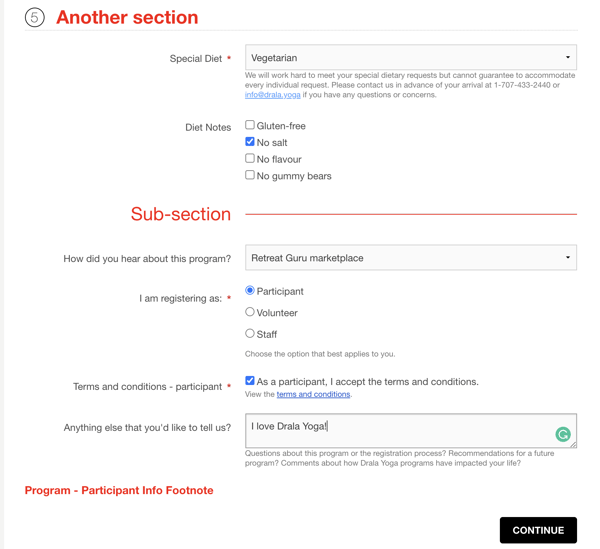
The Another Section shown below was created using a custom Question with Input Type of Heading separator. The Sub-section with the horizontal rule as shown in the image above was created using a custom Question with Input Type of Message (HTML). To create the horizontal rule, the HTML element <hr> was entered in the Help Text for the Sub-section Question.
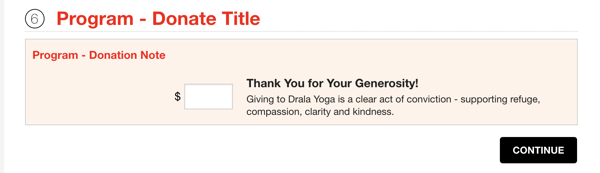
The Donation section shown below will only appear if donations have been enabled for this program.
The Payment section shown below will only appear if payments have been enabled for this program.
Configure customizations for the registration form for a specific program at:
Programs > (choose a program to edit) > Edit Program > Information > Program Information > Text Customizations > Registration Form Titles.

And at Programs > (choose a program to edit) > Edit Program > Information > Program Information > Text Customizations > Registration Form Notes.
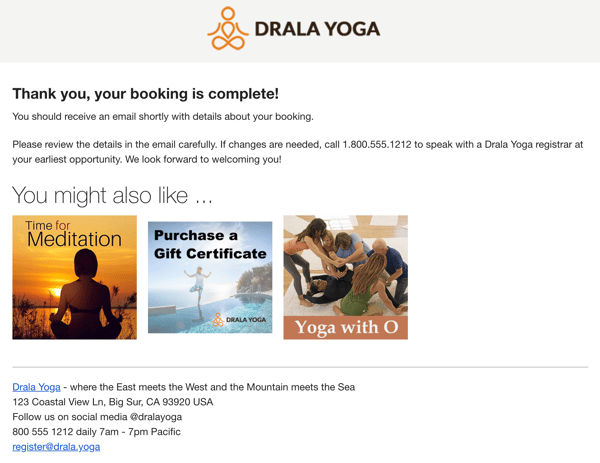
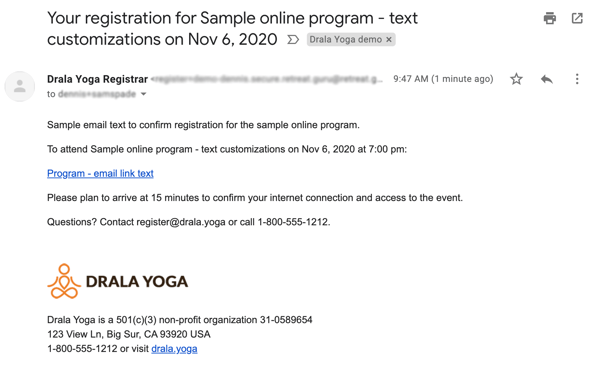
Registration thank you pages
By default, a registration thank you page will be displayed when your guest has successfully completed their registration. The custom text is shown in red for clarity. By default, the text on your site will appear in black.
Global text customizations
Go to Settings > Website > Thank you page to make customizations for the registration thank you page header and footer.

Program-level text customizations
Customize the text displayed on the thank you page for a specific program at:
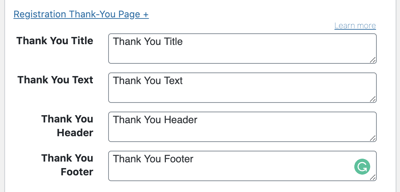
Programs > (choose a program to edit) > Edit Program > Registration > Text Customizations > Registration Thank-You Page.
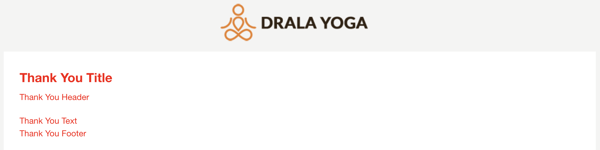
The image below shows a registration thank you that uses basic HTML and styling to further customize the page.
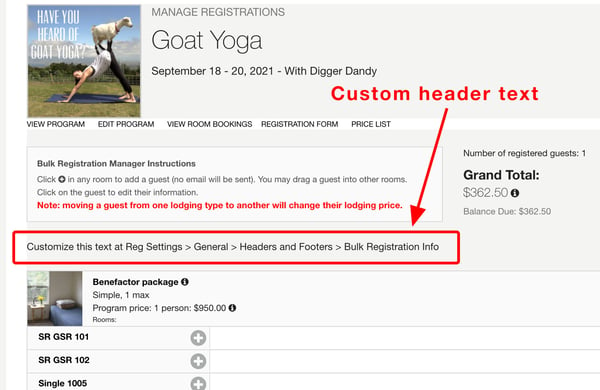
Remote registration form
Add custom header text to the bulk registration form (also known as the Remote Registration for Group Leader feature).
Waiting list forms
Global text customizations
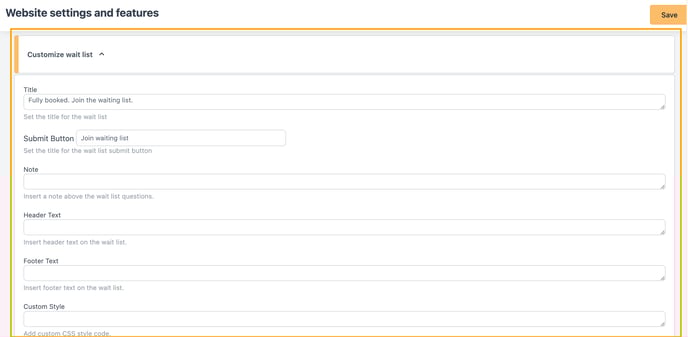
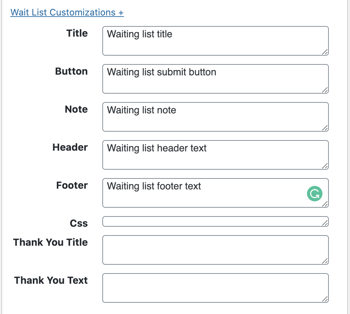
Program-level text customizations
Go to Programs > (choose a program to edit) > Edit Program > Registration > Text Customizations > Wait List Customizations to make program-level customizations.
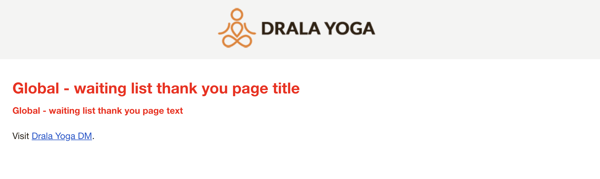
Waiting list thank you pages
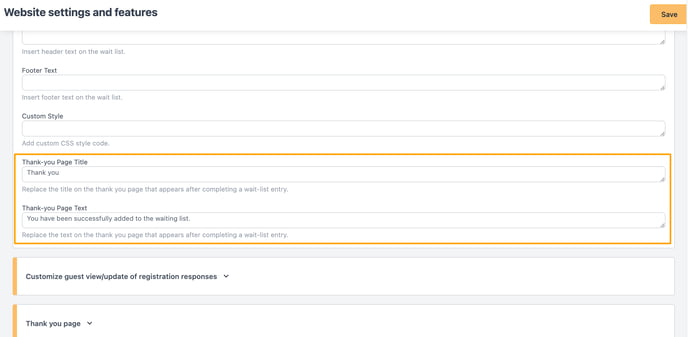
Global text customizations
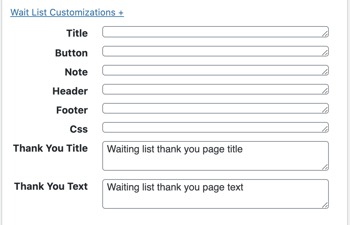
Program-level text customizations
Customize the text displayed on the waiting list thank you page for a specific program at:
Programs > (choose a program to edit) > Edit Program > Registration > Text Customizations.
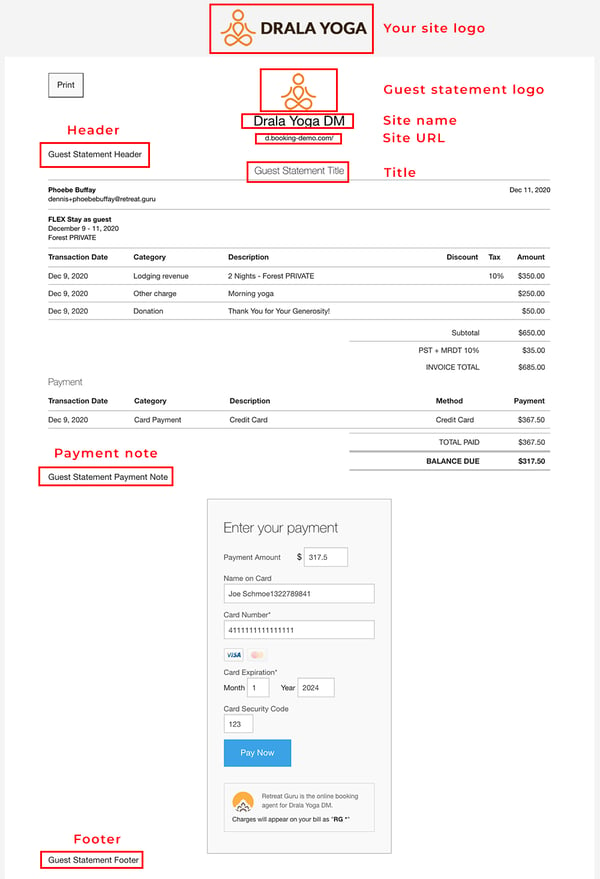
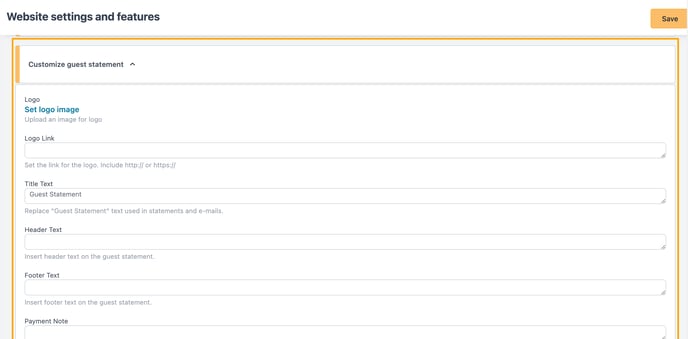
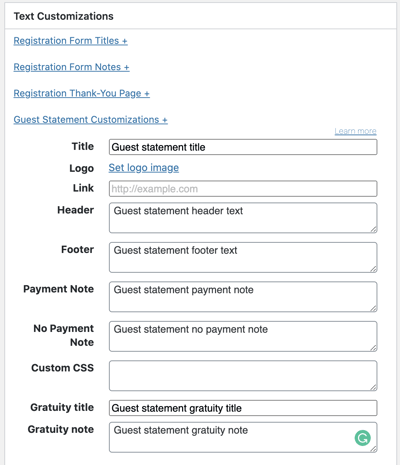
Guest statement
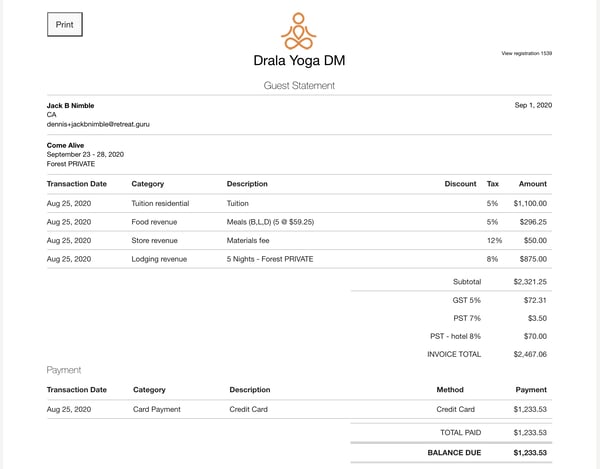
In the image below, the areas outlined in red are available for customization.
The site logo and site URL were configured by Retreat Guru when your site was created - contact your friendly support guru if you wish to change these items.
You may customize the other items on a global basis, for all programs, or on a program-by-program basis.
Global text customizations
Program-level text customizations
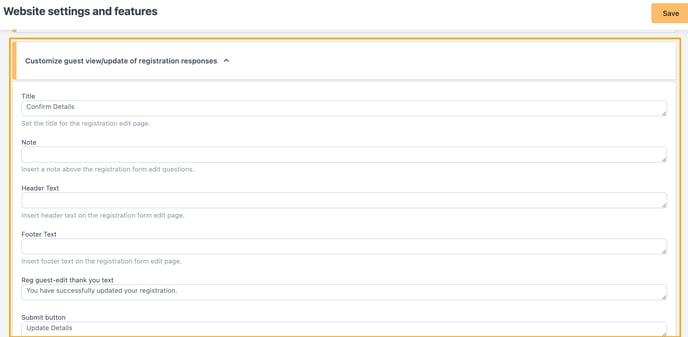
Link for guest to edit details
Global text customizations
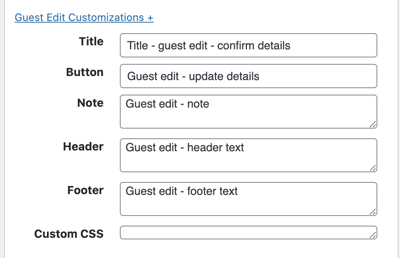
Program-level text customizations
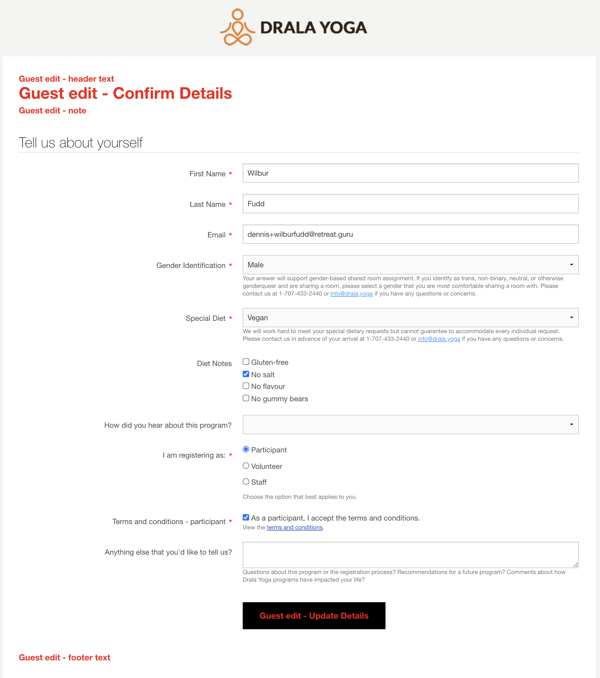
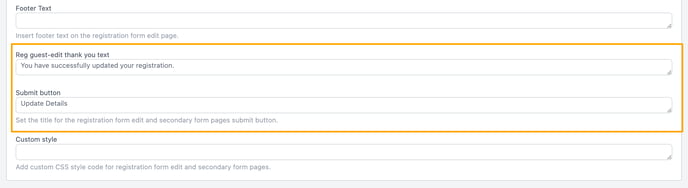
Guest edit thank you pages
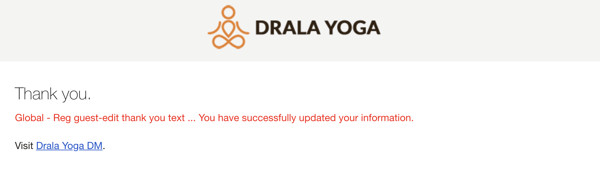
Global text customizations
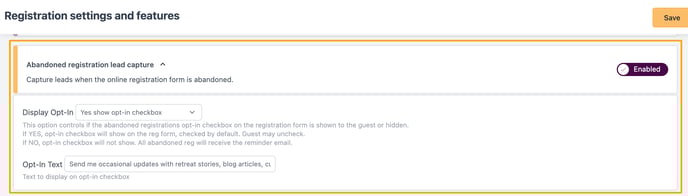
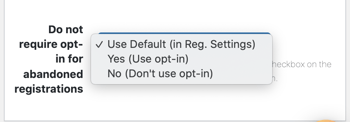
Lead capture opt-in
Also known as the Abandoned Registration Forms or Abandoned Cart feature.
This feature captures information when web page visitors leave before completing the registration form and can be used to discover new participants who've shown interest but interrupted or stopped their registration. You can reach out, ask why, and encourage them to complete their booking.
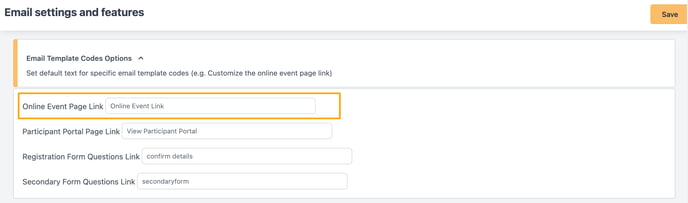
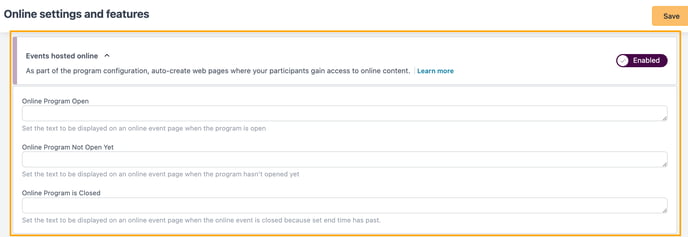
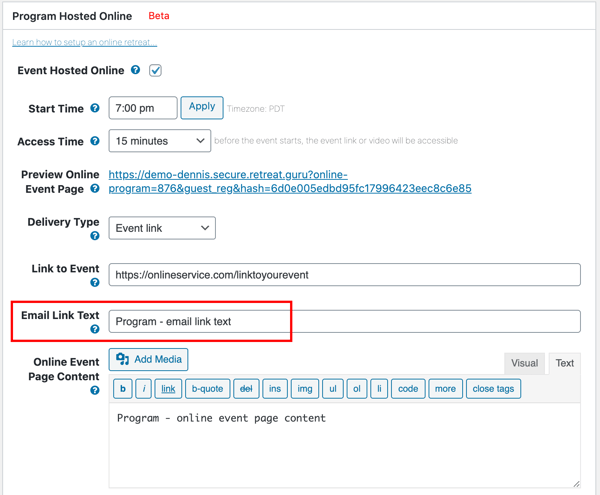
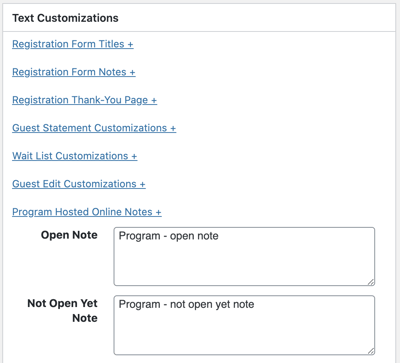
Programs hosted online
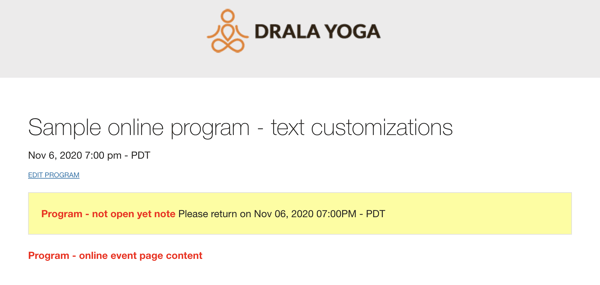
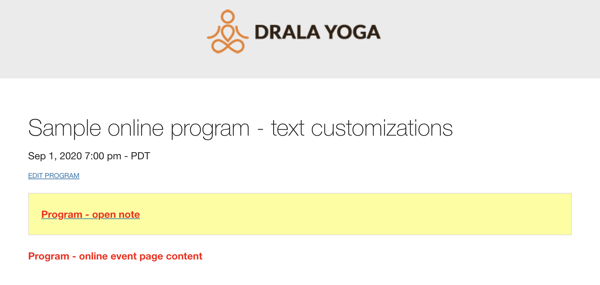
Global text customizations
Program-level text customizations
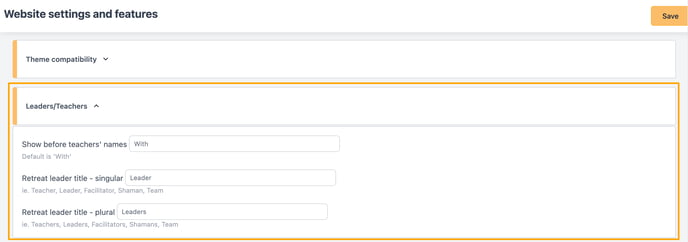
Leaders and teachers
Global text customizations
Program listing plugin
See also, Retreat Guru WordPress Plug-in.
If you use the Retreat Guru WordPress plugin to display programs on your website, you may customize the text used to show availability.
Go to Settings > Website > Listing Plugin to configure options globally - for all programs.

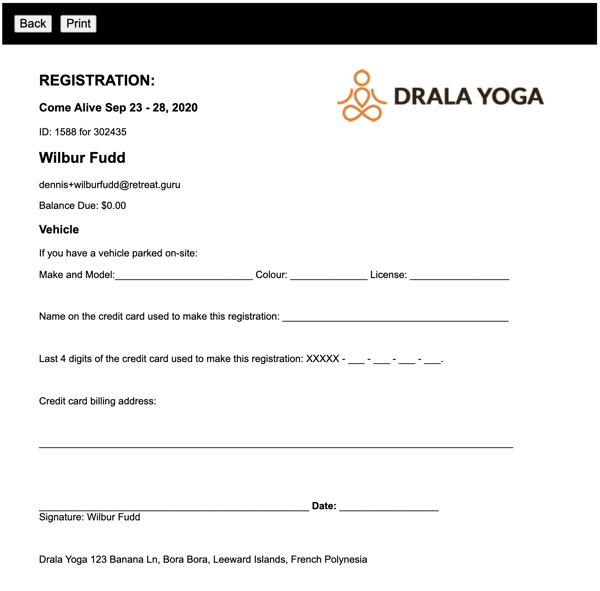
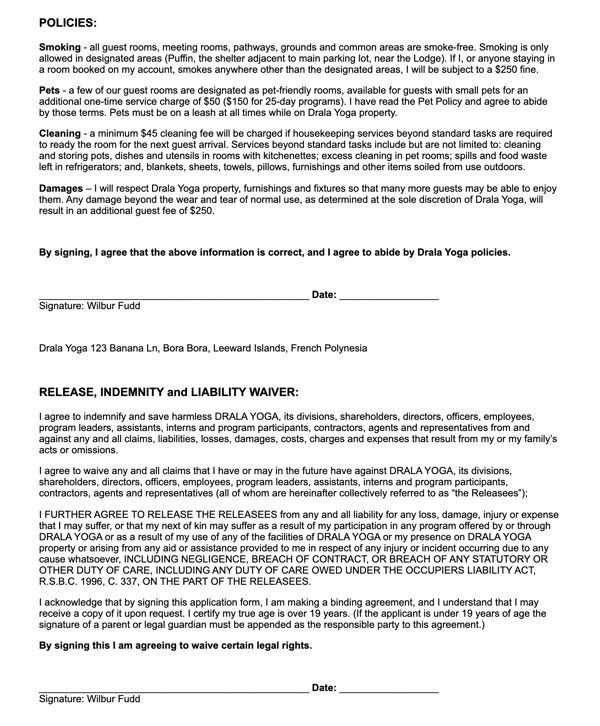
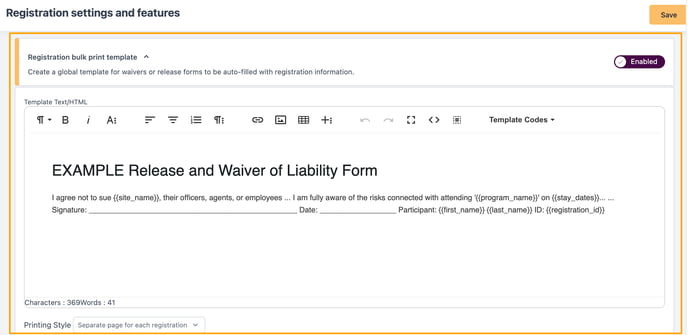
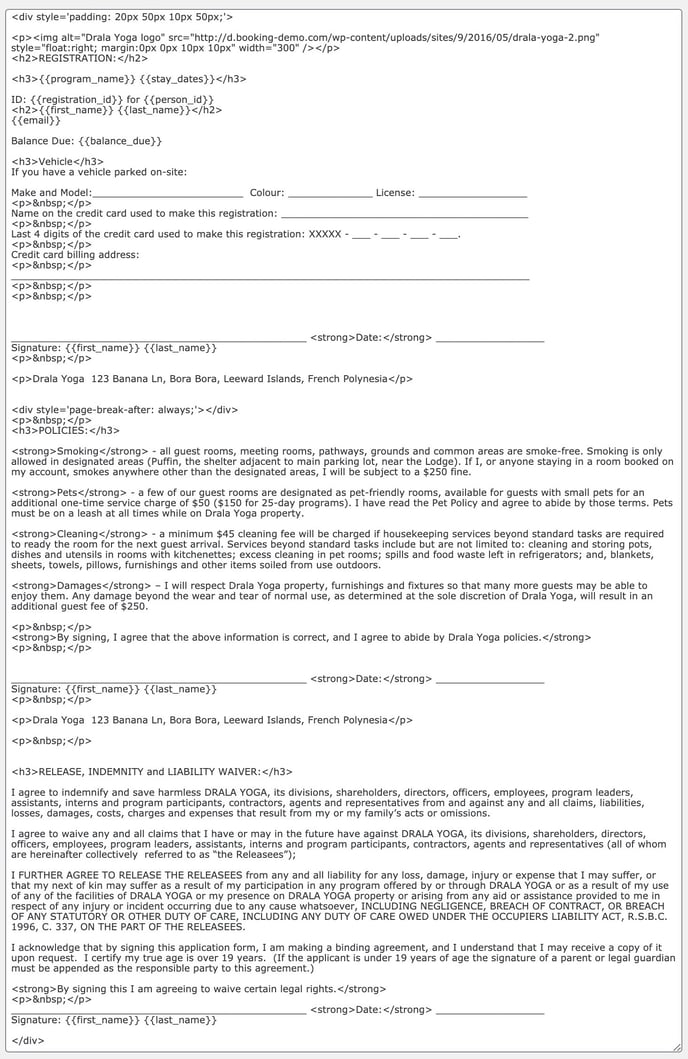


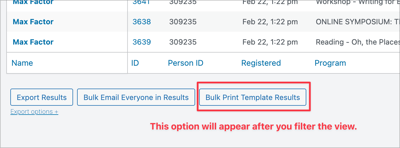
Printing the waivers
![]() Wow, that's a lot of text!
Wow, that's a lot of text!
We'd love to hear from you. Did you find this article helpful? Any additional information we should add? If so, please contact your friendly support guru.