Overview
Think of online retreats as virtual rooms in your center that are always available. You can offer two types of experiences:
- Pre-recorded content that's accessible year-round
- Live events that can be recorded and made available afterward
The "Retreats Hosted Online" feature in Retreat Guru helps you create these digital spaces for meetings, webinars, livestreams, and recorded content. You can provide access instructions and customize welcome messages for your participants.
This special feature is available only with certain software subscription plans. Not sure if your center qualifies? Ask your friendly support guru.
Highlights:
- Event Hosted Online Set-Up
- Displaying Event Content and Instructions
- Accessing the Landing Page
- Text Customizations
- Start Time and Access Time for Your Online Event
- End Date and Time for Your Online Event
- Delivery Type
- Finding and Using Embed Links
- Advanced use of the Content and Links section
Program Set-Up for Virtual Retreats
Creating an online event is very similar to the standard program configuration - you will enter a program description, choose a price, and set up an online registration form. Like in-person programs, your online events are included in your program listings.
One important difference, however, is date selection - only fixed date or ongoing dateless programs may be used.
-
Fixed Date - choose this option to specify the day and time that your guest will be able to see the content and links section of the landing page. Think of this as the date the room is open to guests and the time at which the event actually starts.
-
Ongoing Dateless - content and links section of the landing page will be accessible immediately.
Remember to click on the update button after you've selected the date type.
Event Hosted Online Set-Up
Navigate to: Programs > Edit Program > Program Information Tab and look for the Event Hosted Online section (just below Program Information).
Check the This Program is Online box to begin.
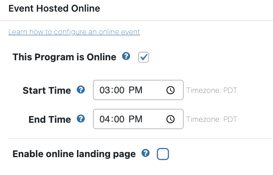
If you wish to remove access to the landing page for all participants, uncheck the Enable online landing page box and click Update on the Edit Program page.
The content will be saved within the program if you want to activate it again, but the landing page will no longer be accessible.
If you wish to block access to the landing page for an individual, just change their registration status to canceled.
Displaying Event Content and Instructions
The online program landing page is the first page participants will see when they follow the link in their registration confirmation email to access your event.
For example:
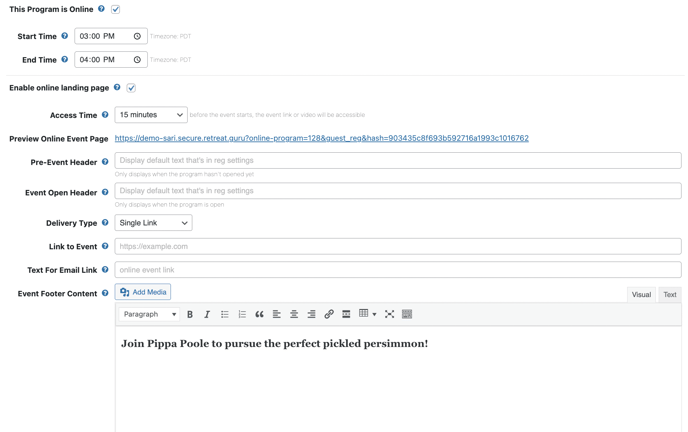
- Choose delivery type Single link
- Enter a URL in the Link to Event box
- Enter information in the Event Footer Content section
- Click on Update (the program)
A link will appear so that you may preview your landing page.
This is NOT the link that you will share with participants - this is a preview link only.
A sample of Event Footer Content is shown below.

Accessing the Landing Page
Participants may access the online event landing page by following the link in their registration confirmation email. This link (unique for each registration) is also displayed in the Edit Registration view.
To include this link in the registration confirmation email, add the email template code {{online_event_page_link}}.
- Email template codes are used to deliver personalized program-specific information to your participants. You may include this email template code in a custom registration email or another automated email.
For a fixed date program:
- The participant will be able to access the landing page immediately upon registration and view the Event Footer Content
- They will not see the Link to Event (URL) until the start date of the program
For an ongoing dateless program:
- The participant will be able to access the landing page immediately upon registration, view the Event Footer Content, and the Link to Event (URL)
- They will be able to access the content at the URL immediately
Text Customizations
While in the Edit Program view, navigate to the Registration tab, and scroll down to the Text Customization section to find Program Hosted Online Notes. Here you may customize the text that appears on the landing page before the event start time and after the event start time, on a program-by-program basis.

You may also set these text customizations globally, for all online programs, in Registration Settings on the Theme tab in the Customize Online Programs section.

Start Time and Access Time for Your Online Event
Start Time is the time that the actual event will start. For example, 3:00 PM.
- The email template code for Start Time is {{online_event_start_time}}.
Access Time is the amount of time before the Start Time that you will allow participants to access the event. For example, 15 minutes.
- The email template code for Access Time is {{online_event_access_time}}.

The Start Time and Access Time do not restrict access to the landing page - the landing page will show the Event Footer Content to any participant with a valid link as soon as you publish the program. The Start Time and Access Time will only restrict access to the Link to Event (or the Content and Links if you choose that option - we'll describe the Content and Links option later in this article).
Example: You created a program called Meditating Online and published it on June 1st. You configured June 24th as the program start date, the date when the online program will be offered, with a Start Time of 7:00 PM. You set the Access Time as 15 minutes. Chris registered for this program on June 15th.
Before June 24:
- Since you published the program on June 1st, the listing automatically appeared on your website and registration for the program opened as of June 1st.
- When Chris registered on June 15th, you sent an automatic registration confirmation email that included a link that Chris could follow to access the online landing page.
- Chris was curious and clicked on the link as soon as the email was received. Since he is visiting the landing page in advance of the actual event, the Event Footer Content is visible, but the link to the actual event is not yet visible.
- Chris follows the same link (in the registration confirmation email) to re-visit the landing page at 6:46 PM on June 24th.
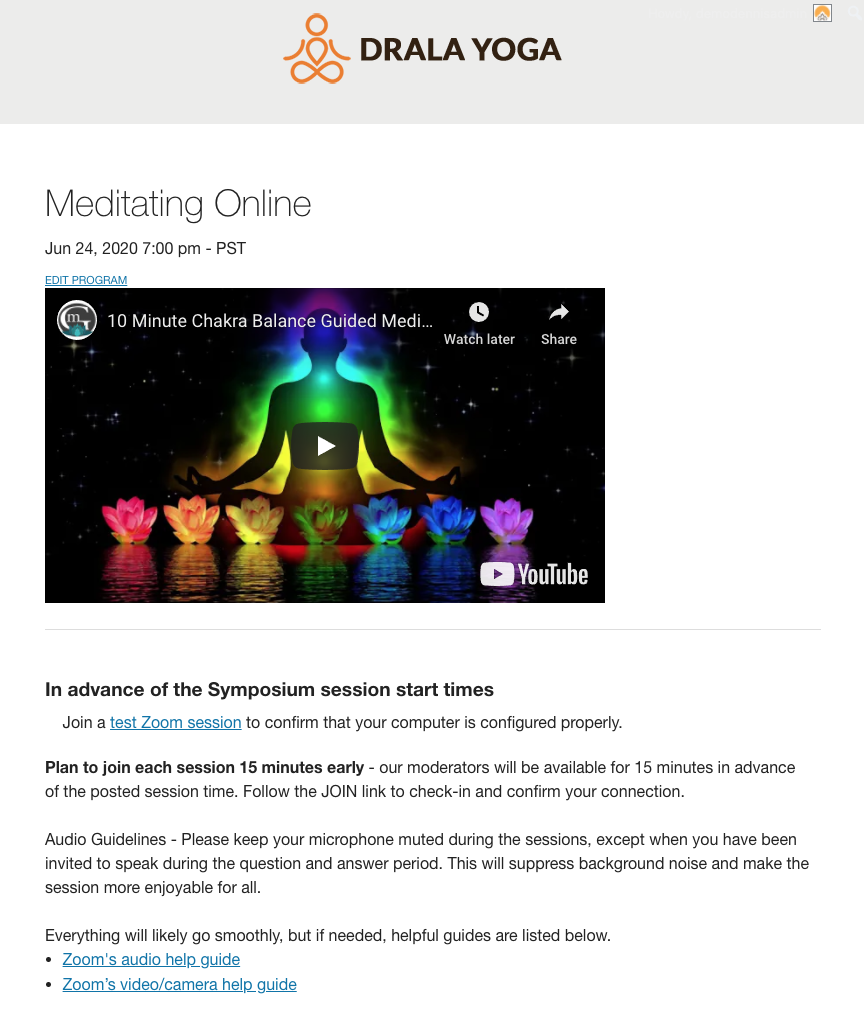
- Since we configured access to be allowed 15 minutes in advance of the 7:00 PM event start time, the Event Footer Content is visible, and the actual event content (the video or Zoom session) is now visible.
- Chris now sees this expanded page view:
End Date and Time for Your Online Event
The End Time field at the top of is for display purposes only, so that participants have an idea how long the event is supposed to last. Your event will not get automatically cut off at this time, and the landing page will not change at this time.
To automatically close access to your landing page at a certain date and time, check Enable post event landing page content.
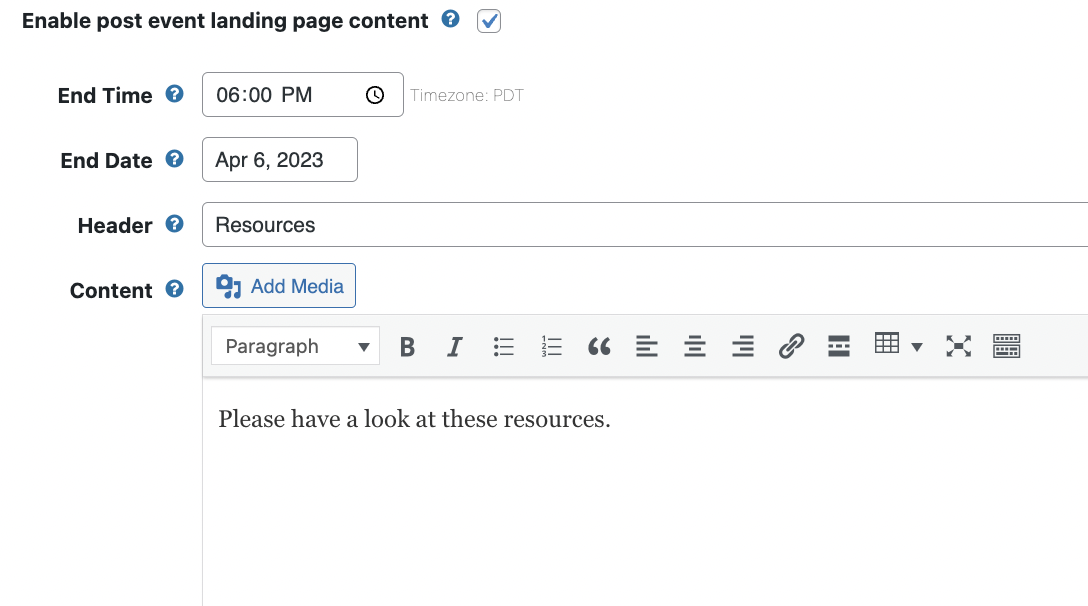
This will override the automatic setting that closes the event at 11:59pm on the end date. When the End Time is reached, on the End Date, the Link to Event (or Contents and Links), and the Event Footer Content will no longer appear on the landing page.
Instead, the post event Content will appear.
Delivery Type
There are two ways to provide access to an online program via the landing page, one using a Single Link and one using Content and Links.
Single Link - copy and paste your Zoom meeting, Microsoft Teams, or another access link in the box. That link will appear on the landing page when the scheduled access time is reached.

Content and Links - copy and paste the embed video code for pre-recorded content, like found on YouTube, or add HTML code in this box to display multiple links, text, images, and more!

Finding and Using Embed Links
Most video streaming services contain an embed link that allows you to directly embed the video on your web page. Here's how you find an embed code on YouTube:
-
Navigate to the video you want to embed and click on share, then embed
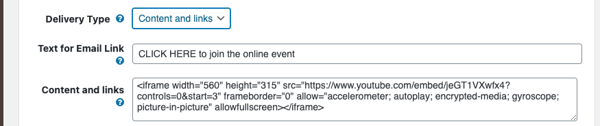
-
Choose the Delivery Type of Content and links, and copy and paste the embed code into the Content and links box in Retreat Guru.

Advanced use of the Content and Links section
When you choose Content and links as the delivery type, you may include more than a single block of code. You can also add images, text, and use basic HTML and styling in the Content and links section to provide access to multiple online events.
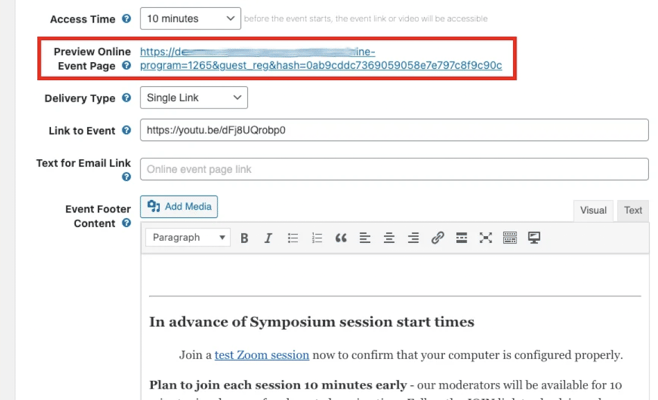
An example of the Contents and links created for a program hosted online over three days with multiple sessions is shown below.
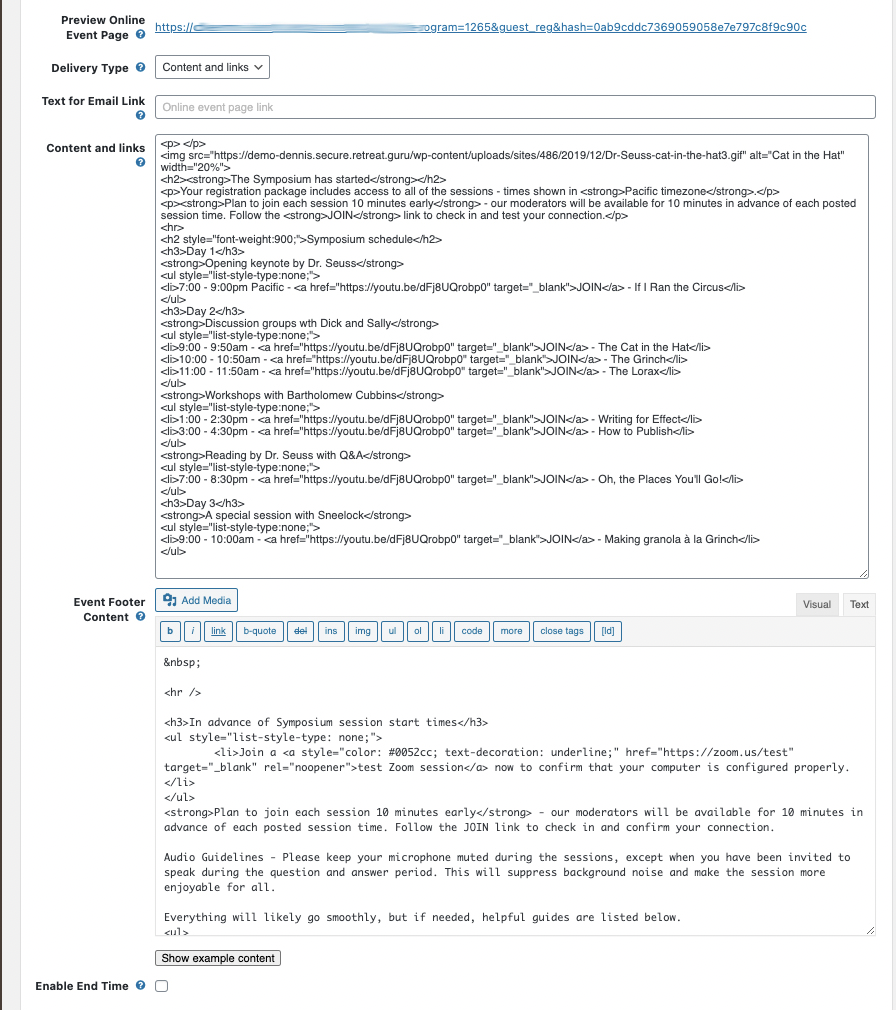
When the access time for this program is reached, the Content and links will be displayed on the landing page as shown below.

![]() We love online events! If you have any questions, comments, or advice on the best way to deliver goat yoga online, contact your friendly support guru.
We love online events! If you have any questions, comments, or advice on the best way to deliver goat yoga online, contact your friendly support guru.